Complete Guide and 2-Week Roadtrip Itinerary for South Island, New Zealand
There are road trips… and then there’s a South Island road trip.
For two weeks, we traded hotel rooms for a campervan and set out on a loop around New Zealand’s South Island, starting and ending in Christchurch. Our route took us through some of the country’s most iconic landscapes, from the turquoise waters of Lake Tekapo, the rugged mountains around Wanaka, the adventure capital of Queenstown, the dramatic wilderness of Fiordland National Park, and the legendary Milford Sound. We finished the journey along the wild northeast coast in Kaikoura before returning to Christchurch.
Along the way we hiked to breathtaking viewpoints (some tougher than others… Roy’s Peak, I’m looking at you), cruised beneath towering waterfalls in Milford Sound, and camped in places so remote we had zero cell service — just star-filled skies and the occasional curious sheep wandering by. Each morning brought a new sunrise over mountains, lakes, or ocean, and every drive somehow felt more scenic than the last.
If you’re dreaming about exploring New Zealand’s South Island by campervan, this guide will walk you through exactly how we did it. I’m sharing our full 14-day itinerary, the best hikes and experiences along the route, where we camped, and tips we learned along the way so you can plan your own unforgettable road trip.
Why a Campervan is the Best Way to Explore South Island
As much as I love undertaking road trips where I can hop in a car for the day but find myself sleeping comfortably in a cozy and clean hotel bed with a daily hot, private shower in our own bathroom every night, I have to say that New Zealand is the place to consider having your hotel room on wheels.
We’ve had one previous campervan road trip experience before, and that was 10 days exploring Iceland. It was pretty miserable in hindsight, much of which was attributed to Iceland’s brutal weather, even in late September. But New Zealand offers a wholly different experience, particularly weather wise when visiting at autumn’s door.
But there are many more reasons why I would 100% do a campervan through New Zealand again if given the opportunity. One of the biggest reasons is having the ability to wake up in incredible locations and to stay within national parks and remote areas. The two national parks we’ll be exploring in this itinerary either have very limited hotel or B&B options that come at a pretty penny, or no accommodation options whatsoever. Camping options, however, are available within the parks, at a much lower cost.
Beyond that, travelling by campervan in New Zealand gives you a level of freedom that’s hard to beat. Some of our favourite moments on this trip weren’t even the big-ticket attractions, but the spontaneous ones: pulling over at a scenic lookout that wasn’t even on our radar, lingering longer by the lake because it made the perfectly quiet spot to cook and have lunch, or arriving at camp just in time to watch the sky explode with colour at sunset.

It also makes the long driving days feel far more manageable. Instead of us worrying about making it to a hotel by check-in time, getting into a nearby town for lunch, or being locked into a rigid schedule, we had much more flexibility to move at our own pace. That kind of freedom is especially valuable on South Island, where the drives are just as jaw-dropping as the destinations themselves.
Where Can You Camp Overnight?
Of course, campervan travel in New Zealand does come with a few things to know before you go. While freedom camping is often part of the appeal, it’s important to understand that you can’t simply park and sleep anywhere. New Zealand has specific rules around where overnight parking is permitted, and many areas only allow freedom camping for self-contained vehicles (more on that later). Even then, local council restrictions can vary depending on the region, so it’s important to always check signage and use tools like the Rankers app to confirm where overnight stays are allowed.
If you’re not planning to freedom camp much, there are still plenty of fantastic options. Holiday parks are a popular choice and usually offer powered sites, shared kitchens, laundry facilities, and hot showers. Department of Conservation (DOC) campsites are another great option, especially if you want to stay in more scenic and remote areas for a lower cost, though facilities can be much more basic depending on the site.
For us, New Zealand felt like one of the best places in the world to do this kind of trip. The roads are incredibly scenic, the camping infrastructure is well set up, and waking up surrounded by mountains, lakes, or ocean views day after day made the entire experience feel that much more immersive. But it was particularly much more comfortable because the campsites we stayed at were very well maintained, especially the Holiday Parks. I’ve never felt as clean and comfortable coming out of a shared bathroom as I did at the Holiday Parks! Mind you, I did take advantage of an afternoon shower after the daily bathroom clean.
If you’re someone who values flexibility, epic scenery, and the ability to turn the journey itself into part of the adventure, I truly think a campervan is one of the best ways to experience New Zealand’s South Island. I’ll be diving further into the different campsites, listing the ones we stayed at, later on in this post!
South Island Road Trip Overview
Before we get into the nitty gritty, here’s a quick summary of our road trip route:
Christchurch >> Lake Tekapo >> Mount Cook/Aoraki >> Wanaka >> Fiordland (Milford Sound) >> Queenstown >> Kaikoura >> Christchurch
In total, driving distance will be about 2,200 km (around 1,350 miles) and about 29 hours of driving time. It works sort of like a loop but there is more back and forth on the same roads, particularly between Queenstown and the Fiordlands and Tekapo and Kaikoura. The advantage of this is that you can hit up certain gems that you missed along the way while driving on the way back.
We personally preferred going west first and covering our more sought out South Island destinations, and then once we felt satisfied with the big ones, we could make our way back to Christchurch and save Kaikoura for the end.
On Day 1, we landed in Christchurch in the afternoon and drove directly for the Lake Tekapo area. We stayed at a nearby freedom campsite before exploring the Tekapo and Pukaki lakes the next day. On Day 3, we headed for Mount Cook/Aoraki National Park and camped at the park’s DOC campsite for the next two nights while exploring the area. On Day 4, we took it slow at Tasman Glacier and spent the rest of the day at the Glentanner Park Centre while we caught up on work and laundry.
On Day 5, we drove through Lindis Valley and eventually arrived in Wanaka in the afternoon. We woke up very early the next morning to hike up to Roy’s Peak Lookout and spent a day out on the lake while enjoying the amenities at the Hampshire Holiday Parks. On Day 7, we drove to Queenstown to unwind at Lake Hayes and Lake Wakatipu.
On Day 8, we drove out to Fiordland National Park and camped in the remote Cascade Creek Campground. Day 9 was dedicated exploring all the sweet spots along Milford Road and undertaking our Milford Sound cruise. Day 10 was focused on doing two half-day hikes in the Fiordlands before we decided to leave the park early and camp overnight at the Mossburn Country Park.
On Day 11, we set off back to Queenstown before continuing the drive back northeast. If you’re daring enough, add some time in the afternoon to bungee jump off the Kawarau Bridge as you leave Queenstown! Option to spend another night here before continuing, or keep driving back to Lake Tekapo.
On Day 12, we passed Christchurch and headed for Kaikoura, where we settled in at a freedom campsite by the beach. The next day was dedicated to our whale watching scenic flight and our peninsula walk to see the fur seals. Finally, for our last night, we camped at the Alpine Pacific Holiday Park where we relaxed in the hot tub and pool before catching our final stunning sunset over New Zealand.
Day 14, we drove back to Christchurch to catch our flight out.
Essential Tips for Driving Around South Island
Driving in South Island is one of the best parts of the actual trip, but it’s also something you’ll want to be prepared for, especially if you’re not used to driving on the left side of the road. The drives are often unbelievably scenic, but they often take longer than they look on the map, so planning with extra buffer time is essential.
Highlighted apps to download:
- Met Service (weather)
- Gaspy app (gas prices)
- Campermate
- Rankers Camping NZ
Driving Tips
First and foremost, New Zealand drives on the left-hand side of the road, and if you’re visiting from North America or Europe (minus the UK) like we were, that’s probably the biggest adjustment in the beginning. We’ve driven cars on the left-hand side, specifically in Scotland when we explored the Isle of Skye, but never a campervan, so there was definitely an adjustment period.
It becomes more natural fairly quickly, but intersections, roundabouts especially, and early-morning starts can still catch you off guard, so it’s worth staying extra alert. The NZ Transport Agency reminds drivers to keep left, especially on curves and non-laned roads where drifting wide can be dangerous.
You’ll also want to be comfortable driving on narrow, curvy roads, especially around alpine passes and Fiordland. Some roads have very few passing opportunities, so if you’re driving slower in a campervan, be courteous and use pull-offs or keep left in passing lanes when it’s safe to let faster traffic by. In New Zealand, when a passing lane opens up, slower vehicles are expected to keep left and not speed up so others can pass safely.
Another thing to watch for is one-lane bridges, which are common in parts of New Zealand. These can feel intimidating at first, but they’re straightforward once you understand them: check the signage before the bridge, yield if required, and only proceed when it’s clear. They’re usually well marked, but it helps to slow down and stay focused as you approach.
If you’re travelling in shoulder season or cooler months, always keep an eye on the weather and road conditions. Mountain weather can change quickly, and rain, fog, or even snow can make certain routes feel very different from what you expected. This is especially important in places like Mount Cook and Fiordland, where conditions can shift fast and visibility can change dramatically. A great site or app to have open on your phone to get an accurate weather forecast is Met Service.
Try not to cram too much into a single driving day. South Island is one of those destinations where the drive is part of the experience, not just the way to get from point A to point B. Some of our favourite moments came from unexpected scenic pull-offs, lakeside lunch breaks and random stretches of road that somehow ended up being just as memorable as the destination itself. Yes, we love our road shots!
Finally, for my budget-keepers out there, with gasoline (petrol) becoming more and more expensive in New Zealand, especially these days, you’ll want to download the Gaspy app, which gives you live updates for the best gas prices near you or where you’re going. This app came in clutch for us as our campervan was a bit of a gas guzzler.
Campervan Tips
The biggest tip I can give is to book key campsites in advance, especially in popular areas like Lake Tekapo, Aoraki/Mount Cook, Wanaka, Queenstown, and Fiordland. Department of Conservation (DOC) campsites are fantastic for scenic locations and affordability, but many serviced campsites and some scenic or standard campsites require bookings during peak season, which is usually October 1 to April 30.
DOC campsites can vary a lot in comfort level, so it’s important to know what you’re signing up for. As I mentioned, some are serviced campsites with flush toilets, water, kitchens, and sometimes hot showers; while others are basic campsites with very limited facilities where you need to be fully self-sufficient. DOC notes that basic campsites may only have simple (i.e. pit) toilets and untreated water for dish cleaning only, so it’s smart to check each site ahead of time.
This was what our DOC campsite was like in Fiordland National Park, and no other campsite in the park had further facilities. Knowing the true conditions of what our camping road trip would be like beforehand allowed us the informed decision to rent a self-contained campervan for our desired level of comfort, so we could work, rest, cook, eat, sleep and do our business in the one vehicle, if need be.
If you want a few comfort resets during the trip, I’d strongly recommend mixing in the occasional holiday park stay like we did. They’ll give you a chance to recharge both yourselves and your devices. After a few rustic nights, that kind of reset can feel luxurious. And it’s such a refreshing new perspective when a hot shower in a shared campsite feels like a luxury!
When it comes to freedom camping, don’t assume you can simply park and sleep anywhere. New Zealand has specific rules, and many areas only allow freedom camping in self-contained vehicles. Under the Freedom Camping Act, a self-contained motor caravan or caravan must be equipped with a permanently fixed toilet, and local restrictions can vary depending on the region. Always check signage carefully and use apps like CamperMate or Rankers to confirm where overnight stays are permitted before settling in for the night.
Because cell service can disappear quickly in remote areas (which we experienced plenty of), I highly recommend downloading an offline Google Maps map.
When it comes to campsites and points of interest, you’ll want to have the CamperMate app in your back pocket, but the tool that is most versatile is the Rankers NZ app. This one, albeit simple in its interface, shows you all the campsites, and you can filter by DOC, freedom, self-contained camping, which ones have dump stations or water supply to fill up, and it shows the pricing and reviews. We used Rankers extensively throughout our road trip, although we typically booked our stays directly with the campsite, online or in person.
It’s smart to stay on top of your water, fuel, and dump station logistics. Don’t wait until the last minute to refill fresh water or empty waste, especially before heading into remote areas like Fiordland or Mount Cook. At least in Mount Cook, the DOC campsite had an indoor kitchen to cook, wash your dishes and fill up on drinking water. But the dump station was an hour drive away, so we had to be economical with how much liquid we ran down the drain.
And lastly: pack for all seasons, even if you’re travelling in summer or autumn. South Island weather can swing fast, especially in alpine areas. Warm layers, a rain jacket, sturdy footwear, a headlamp, and a power bank will all come in handy more often than you might think.
Best Time to Visit New Zealand’s South Island
For the best weather to explore, not only South Island New Zealand but North Island as well, you’re going to want to come in the summer, which is from December to February. The days are longer and the likelihood of poorer weather conditions is low.
For great weather plus better deals and amazing fall colours, especially in Wanaka, you’ll want to look at coming in autumn, ranging from March to May. This is around the time we came, specifically the first two weeks of March. So the prices were a bit more favourable for our campervan, the crowds weren’t too bad and we could book campsites with a little leeway on how far in advance, and we had great, sunny weather all but two days of our trip.

The spring time is optimal if you want to experience New Zealand’s wildflower season. The lupines are in full bloom, which is such an iconic part of visiting New Zealand. This is definitely something we missed out on, although we did get our dose of lupines when we explored Torres del Paine, in Chile’s Patagonia. Spring time ranges from September to November, with the latter being most optimal for better weather and wildflower blooms.
The winter months (June to August) are gorgeous with the snowy mountains, fewer crowds and great prices. But definitely be prepared for a winter camping experience, and for some hikes or roads being closed if you choose to come during this time.
14-Day South Island Itinerary
Day 1 – Arrival in Christchurch
- Driving Distance: 220 km (140 miles)
- Campsite: Mackenzie Waitaki RV Camping
After landing in Christchurch (CHC), make your way to your campervan rental company to pick up your new home on wheels. A lot of the major camper rental shops offer complimentary airport pickup but you’ll want to arrange that with the shop beforehand. When we booked with Euro Campers, their system was great at prompting us to coordinate our flight details and arrival time, and select a pickup time with their driver. If for some case your pickup doesn’t show up, or you have trouble finding their representative at the airport, keep a contact for your camper rental and call them when you land.
If you land early in the day, you can spend some time exploring Christchurch before hitting the road. But be sure to save plenty of time to do a grocery run and purchase any other items you might need, as well as allocate at least 3 hours to drive to the first campsite near Lake Tekapo.
Speaking of grocery stores, the “big three” supermarkets you’ll want to keep an eye out for are:
- PAK’nSAVE, which is the overall cheapest “no frills” store, great for buying your staple goods and some bulk items
- New World, the premium and specialty store that is best for fresh produce, butchery and deli items as well as imported specialty goods
- Woolworths, which is great for convenience and loyalty rewards prices (which you likely won’t have a membership card for, so this one may be lower on your priority to visit)
We personally really liked shopping at Pak’nSAVE for the prices and the variety of goods they had, considering the fact that they had pretty much everything we needed for simple foods, produce and snacks for a two-week camping trip. But we still made a number of runs at New World and Woolworths when we were missing a few items, needed fresh meat and veggies, wanted some ready-made hot foods, or snacks and energy drinks.
Regardless of which one you shop at, every receipt will give you a coupon to save on gas at their associated gas stations, so you might as well fill up your tank after grocery shopping and do this whole run at a town closer to Tekapo than Christchurch.
For your first night, you can stay just a 5-minute drive from Lake Tekapo at the Mackenzie Waitaki RV Camping, which is a decently sized freedom camp spot. If you get there early enough, you can park further from the road entrance and right up against the fence facing out to the fields for a private view. We enjoyed a warm and bright orange sunset there our first night while we cooked our first meal and got the campervan set up for bed.
There is a clean and enclosed pit toilet on the premises that is a short walk from any camp spot you take, which makes it easy to do your business at night and early morning.
Day 2 – Lakes Tekapo & Pukaki
- Driving Distance: 100 km (62 miles)
- Campsite: Lake Pukaki Overnight Campervan Parking
- Highlights: Lake Tekapo, Lake Pukaki
Morning Sights at Lake Tekapo
Hopefully your first morning sleeping in the campervan was more comfortable than you expected! It definitely was for us which was a welcomed surprise. After you take your breakfast, drive over to your first scenic place in South Island New Zealand, Lake Tekapo.
When we reached the shoreline of Tekapo, we were surprised to find the lake so calm and clear. The shallows revealed all the rocks piled and displayed like a mosaic below the water surface, and the further out we looked, the more the water reflected the sky. This was also our first look of the lower mountains Aoraki / Mount Cook National Cook, and we were just scratching the surface of how beautiful their profile was.

If you come here during the Southern Hemisphere’s late spring season, from mid-November to early January, this is one of the most prime spots to find the lupines in full bloom. Unfortunately, our arrival in early March made it so that we couldn’t see their abundant colours of purples and pinks, but we did find many bumblebees buzzing around and pollinating the viper’s-bugloss wildflowers.

Walk along the shoreline path, across the bridge over to the Church of the Good Shepherd. Built in 1935 as a memorial to the local pioneers, this small stone church is renowned for blending right into the landscape—much like a reflection of the stones you find at the lakeshore—but also for being one of the most photographed buildings in New Zealand.

We managed to walk inside during the hours we were here, and saw that the altar features a large window that perfectly frames the scenic view of the lake and mountains ahead.
It’s also an incredible place for stargazing opportunities as it sits within the Dark Sky Reserve. Keep this in mind if you have the energy on the night of your Day 1, or even later on your Day 2, to come out here and enjoy the gorgeous dark sky being painted by the stars! Tripod and wide camera lens at the ready.
Lunch and Afternoon Swim at Lake Tekapo
As lunch time was approaching, we aimed to drive to a quiet spot to set up a picnic and enjoy an open view with no one around. We got exactly what we wanted by driving along the gravel road that lines the east side of Lake Tekapo, and arrived at the Lilybank Road Viewpoint.

It was one of the first moments we fell in love with the idea of campervanning in New Zealand and could not have been more perfect as we peered out to the island of Motuariki.

Now we understood what all the hype was about, and why people were so enamoured with campervanning in this country.
The day was getting hotter with the cloudless sky we had, so we thought it’d be a great time to cool down and take our first “nature’s bath”. We didn’t actually bathe in the lake, but very much enjoyed a brisk and refreshing swim at Lake Tekapo’s recreational swimming area! So many folks were lounging in the park and on the beach, it felt like summer was still stretching out its arms to stay with us.

Evening Wind Down at Lake Pukaki
As evening nears, you can start driving to Lake Pukaki and stop as you like along its southern edge. On a clear day you’ll get your first impression of Aoraki / Mount Cook in the distance! You’ll also find that Pukaki is almost preternaturally vibrant blue, a shade of turquoise that is the epitome of glacial blue.

Make your way to the Lake Pukaki Overnight Campervan Parking and secure yourself a spot for the night. There is abundant parking space on the four levels of the campsite, but the lower ones are much closer to the washrooms, and the upper ones are further but have a higher view of the lake, so pick wisely!
We settled in and made dinner, and as the sun started to set, the shades of pinks and oranges in the sky were ones we couldn’t pass up on capturing.


Day 3 – Aoraki / Mount Cook Hikes
- Driving Distance: 60 km (37 miles)
- Campsite: White Horse Hill Campground (DOC)
- Highlights: Peter’s Lookout, Hooker Valley Track, Sealy Tarns Track
Photo Stop at Peter’s Lookout
After breakfast, you can start driving along Highway 80 towards Aoraki / Mount Cook National Park. Only 15 minutes in, you’ll find Peter’s Lookout, a well established photo spot known for the winding road leading you to the unyielding Mount Cook.

When we first drove in on our Day 3, we couldn’t yet see Mount Cook from here as it was still a cloudy morning, so we decided to keep driving but came back to the lookout the following morning. It was so worth the drive back because this view is absolutely gorgeous in the morning, with the road serpentined on the left, Lake Pukaki on the right and Aoraki framed beautifully in the middle.
On a clear morning, the lake, mountains and sky look so impeccably blue!
As we kept driving up Highway 80, we did stop along the road by a gorgeous meadow on the east side. The low clouds were starting to lift and reveal the mountainous landscape so we couldn’t pass up on the opportunity.

Hike the Hooker Valley Track
Once we reached the end of Hooker Valley Road and did our self-checkin at the White Horse Hill DOC Campground on site (by filing out a paper at the hut with our reservation number and popping it into the dropbox), we parked our campervan and headed for the Hooker Valley Track.

The morning conditions were starting to look very promising as the thick clouds turned into fluffy veils brushing across the sky and mountain peaks. We got our most picturesque view at Lake Mueller Lookout before the sky became near cloudless for the rest of the day.
We spent about 3 hours walking the Hooker Valley Track, which goes about 10 km (6.2 miles) out-and-back with 100 m (300 ft) of elevation gain. It’s definitely our favourite “easy” hikes in New Zealand, as the views consistently change while you cross three large suspension bridges, walk along the meadow boardwalk and finally reach the glacial blue Hooker Lake, taking the views from above and at the lakeshore.


We enjoyed a light protein bar snack at the lakeshore, taking in the views for half an hour before heading back to the campsite. The afternoon was dedicated to resting our feet, cooking up a hearty lunch and talking for hours as we relaxed with the tailgate open to a gorgeous mountain view. We had very limited cell service here, but it was so revitalizing to disconnect and reconnect, with each other and with the nature around us.
Hike Up to Sealy Tarns
As the end of the afternoon nears, it’s time to gear up for another short, but strenuous, hike! The Sealy Tarns Track might take about the same time to complete as the Hooker Valley Track, but the roundtrip distance is only about 5.3 km (3.3 miles) with 540 m (1770 ft) in elevation gain—a drastic difference.
The track is pretty much uphill the entire way, primarily consisting of stairs with 2,200 steps to conquer. It takes you up to these small, freshwater pools on the slopes of Mount Ollivier, that, in calm weather, gives the most gorgeous reflection of Mount Cook. Unfortunately, when we made it up to the top, the wind had picked up quite a bit so there wasn’t a crisp reflection anymore.


The view of the mountain range was still immensely gorgeous, we couldn’t believe it. We were towering over Mueller Lake and could see Hooker Lake framed beautifully in the valley carved out under Mount Cook, which by the way was lit up by the golden hour sun. It was a stunning viewpoint to have all to ourselves that evening, and though we couldn’t see tarns being calm and reflective, it was worth the tiring climb up after already doing a hike earlier!

You might feel pretty sweaty and gross after your two day hikes, so if you’re looking to get freshened up, there are free cold showers—the water is freezing but it was tolerable for us—located at the Mount Cook Village public shelter. You can pay an additional NZ$2 for 3 minutes of hot water, which you’ll need $2 coins to pay for as cards and banknotes aren’t accepted. It’s enough to get you by until you get to your next equipped campground, which we recommend for Day 4!
If you didn’t get a chance to get up or stay up for stargazing at Lake Tekapo, you won’t want to miss a night under the stars in Aoraki Mount Cook! It’s crazy how bright the stars get, even within a couple of hours of nightfall. Some photographers will actually hike along the Hooker Valley Track again for incredible astrophotography.
Day 4 – Tasman Glacier Adventures
- Driving Distance: 40 km (25 miles)
- Campsite: Glentanner Park Centre
- Highlights: Tasman Glacier Viewpoint & Helicopter Ride
As tired as you may be if you stayed up to see the stars, a sunrise over the Mount Cook valley is one you won’t want to miss! At least set your alarm and poke your head out to take a look to see if the sky is popping. Luckily Jason got up to use the restroom, which ultimately encouraged me to get out of the campervan for a morning stretch.
Fortunately, sunrise in early March in the Aoraki area is at 7am, so not too early. And my goodness was it worth getting out of the camper to have a look! A lot of the sunrises and sunsets in South Island New Zealand were memorable, but I think this one topped them all.

Tasman Glacier Viewpoint
While the day is young, drive over to the Tasman Glacier car park and head on the walk to the series of blue lakes and Tasman Glacier view. It only took us about half an hour to see a couple of the lakes (they were mostly dried up at the time) and make our way up the built in steps and gravel path to the viewpoint.
Though the view of Tasman Lake and Glacier cannot compare to the sights we’ve seen in Mount Cook so far, it was worth capturing the massive lake featuring icebergs near the shore, and the immense, albeit blackened, glacier on the opposite end of the lake.

The road back to the Aoraki Mount Cook Village was quiet and beautiful and we couldn’t resist stopping to get some road shots on Tasman Valley Road.


Tasman Glacier Helicopter Ride (and Hike)
Before wrapping up your time in Aoraki Mount Cook National Park, you might want to consider undertaking quite the glacier adventure. Taking a helicopter ride over Tasman Glacier with an alpine landing is considered a must-do in the park if your budget allows, and it can take up as little as 30 minutes of your day. But if you’re feeling more adventurous, a Tasman Glacier heli hike may just be up your alley.
You spend three hours with a small group and a well trained guide, they take you on an insane helicopter ride through the Mount Cook mountains over insane views you may only get once in your lifetime, and plop you on top of the Tasman Glacier to hike on ice that few others have stepped on before.
These scenic helicopter rides, as well as the scenic flights, takeoff from various aerodromes, but most of the ones in the area will either takeoff from the Aoraki Mount Cook Village or from Glentanner. They also operate as different times throughout the day (weather dependent) so you can still easily fit in your morning walk to the Tasman Glacier Lookout beforehand, or save it for later in the afternoon.
Whichever meeting point and tour company you choose to go with, for this night, we recommend staying at the Glentanner Holiday Park. It’s a fully equipped campground with many powered sites available, as well as a kitchen area, laundry facilities, and of course hot showers. It was refreshing to get some of these tasks done and charge up our electronics after a few days without power. We also had the ability to plug in the little space heater we had in the camper for a warmer sleep. Enjoy some time to recuperate before making a longer driver tomorrow.
Day 5 – Driving to Wanaka
- Driving Distance: 185 km (115 miles)
- Campsite: Red Bridge Freedom Camp
- Highlights: Drive through Lindis Pass
There’s no need to get up early on Day 5. You can sleep in, take a longer breakfast, and slowly make your way out of the Mount Cook. This is also a great time to stop for fuel, a dump station, and a refill on your drinking water. Depending on the size of your tanks and how often you are using your kitchen sink, you might need to do so every 3 or so days. Use the apps and tools mentioned in the sections above to see where is best to do these tasks before hitting the road for a longer drive.
As you make your way southwest towards Wanaka, you’re going to drive up and through the Lindis Pass which is scenic in its own way. Give yourself some time for stops at the various viewpoints that overlook the arid, straw-coloured rolling mountains made up of snow tussock.

If it’s around lunch time, make sure to stop for a delicious New Zealand pie as you enter Wanaka. We got some tasty pies like a butter chicken flavour and a steak & cheese, both affordable as well.
You might have an early afternoon arrival into Wanaka, so before settling in, I would suggest heading straight to Roys Bay Beach for your first view of Lake Wanaka. But after that, take the rest of the day to rest up, as tomorrow is going to be a tiring day.

We chose to stay at a free campsite called Red Bridge Freedom Camp which became really full as the afternoon turned into evening. It’s a large, open and flat gravel area, that sits above the turquoise Clutha River with a captivating red iron bridge crossing over it. We spent the majority of our afternoon here taking a nice nap, cooking an early dinner and heading off to sleep at an early hour, and walking to the washrooms, we also saw so many little bunnies grazing in the bushes.
Day 6 – Roy’s Peak Hike & Exploring Wanaka
- Driving Distance: 15 km (10 miles)
- Campsite: Hampshire Holiday Parks – Wanaka
- Highlights: Roy’s Peak Lookout, Mou Waho Island
Hiking Up Roy’s Peak Lookout
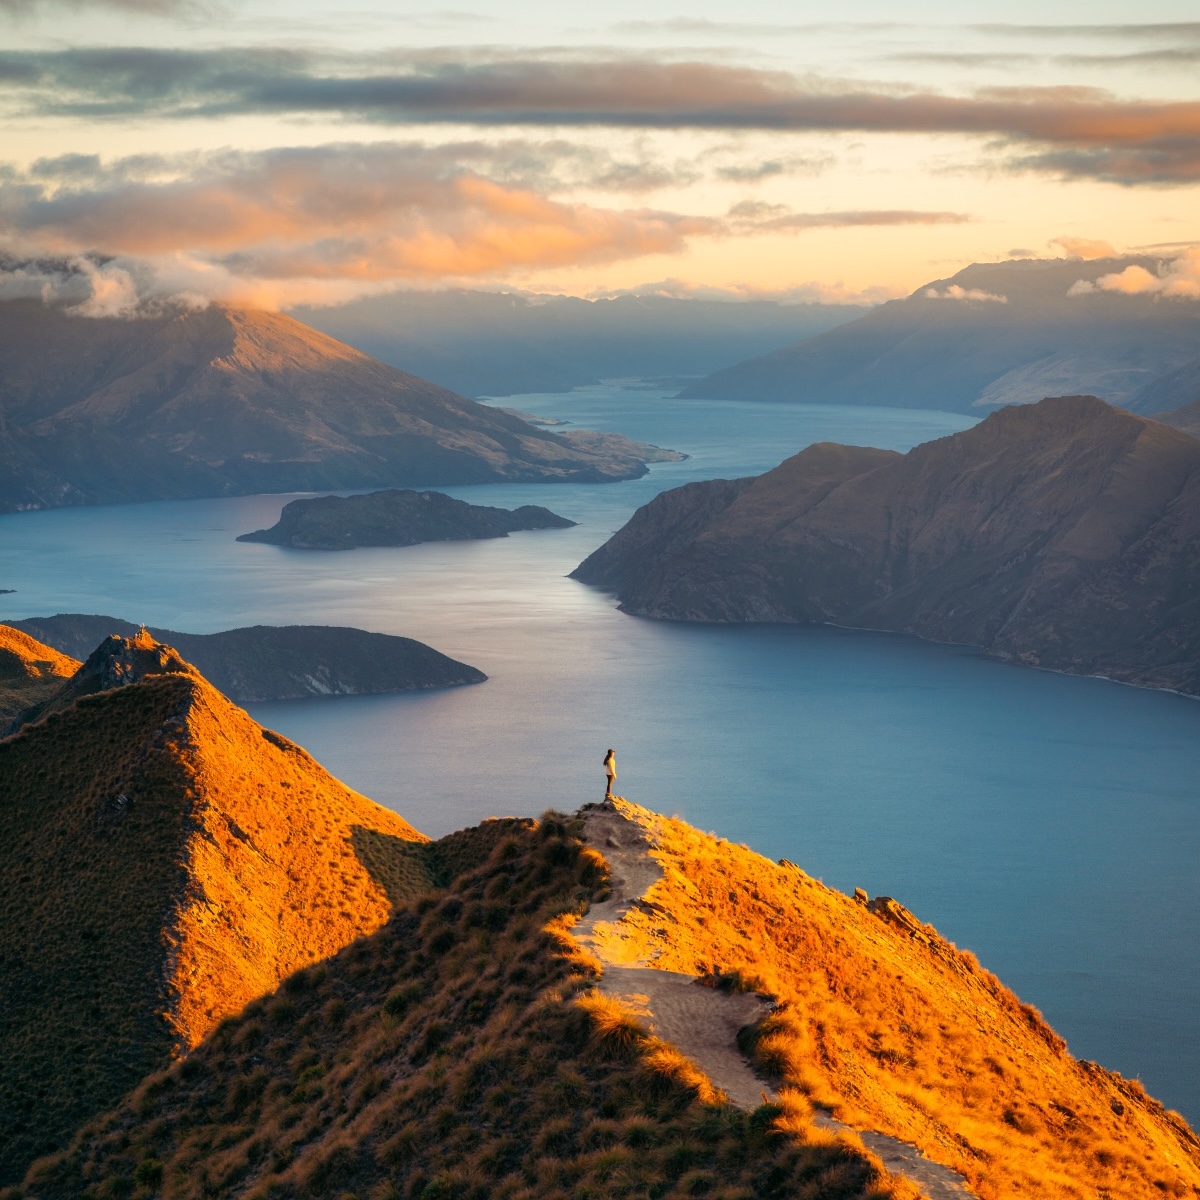
It’s going to be a crazy early wakeup for Day 6, at an excruciating 3:30-4am. That is, if you want to hike up Roy’s Peak in time to catch sunrise. And if our experience is anything to go off, it’s 1000% worth setting your alarm for.
Hiking up to Roy’s Peak Lookout, never mind all the way up to Roy’s Peak Summit, is challenging. The trail itself is as straightforward and non-technical as it gets. It’s pretty much a gravel road the whole way up that cuts through farm land, with some livestock fences to cross. But the distance and elevation gain, just to the lookout, are roughly 13 km (8 miles) and 980 m (3220 ft), respectively.
We trudged for 1h45min in the pitch black up the steep incline, seeing nothing but the ground below us, the trail of headlamps ahead of us and, surprisingly, a sky of bright starts above us. Once we reached the turnoff for the lookout, we were drenched in our sweat and quickly started to freeze. I guess making it up the hike in good time meant we were going to shiver in the dark for another hour before the sun would peak through behind the mountains.

This was the coldest we have ever felt at the top of a hike, even more so than on Mount Batur, Bali, or the Acatenango Volcano, Guatemala. But despite barely feeling our hands and shivering against our will, we were completely captivated by the panorama of the Southern Alps and the endless Lake Wanaka. One of my favourite frames was of the low clouds brushing below the peak of the pyramidical Mount Aspiring.

When blue hour changed to golden hour, and the lookout ridge turned golden under the pink sky, our pain and fatigue was all the more rewarded. We even spotted a paraglider sailing up in the sky and floating down towards the lookout, close enough that we could yell “hi” to him!


The way back down the trail showed us all that we missed having climbed in the dark, and the changing views along the switchbacks was stunning enough that I couldn’t help but snap photos at every turn.
Grab an early lunch (we stuffed ourselves with Domino’s Pizza after the hike) and check into the Hampshire Holiday Parks when you can to rest up and shower if you want to do so midday. Honestly, the washrooms were spick and span, squeaky clean when we were the first to use them in this early afternoon after check-in.
The Hampshire was probably our coziest and cleanest stay in New Zealand, and we would’ve honestly liked to stay longer as they had a “pay for 2, get 3 nights” discount. Definitely look out for those multi-night deals as sometimes they can be a real money saver for the private holiday parks!
Lake Wanaka Cruise to Mou Waho Island & Nature Walk
Hiking up Roy’s Peak for sunrise means you’ll be done before it’s even midday. So if you’re not completely deflated and exhausted from the hike, you have all afternoon to do some further exploring in Wanaka.
If you think your legs can handle a little more hiking, our top recommendation is the 3-hour Lake Wanaka cruise and nature walk on Mou Waho Island. The island features its own small lake called Arethusa Pool, and during the nature walk you’ll get up to the lookout point overlooking the pool. It’s a unique spot in that you get to see a lake on an island, in a lake on an island!
Mou Waho is also a predator-free haven for buff weka, a cute bird endemic to South Island. Back in the 1920’s, weka actually went extinct on the South Island mainland, due to habitat loss and introduced predators. But fortunately, in the last couple of decades, buff weka were reintroduced on the islands in Lake Wanaka, away from predators, so they can thrive in a sustainable way. Hopefully you’ll get to spot a few of these cuties on the nature walk!
Day 7 – Queenstown Wine & Relaxation
- Driving Distance: 125 km (78 miles)
- Campsite: Mrs Woolly’s Campground
- Highlights: Lake Hayes, Onsen Hot Pools, Glenorchy
Before leaving Wanaka, make sure to make a photo stop at the famed That Wanaka Tree during sunrise while the lake is still calm. Depending on the water levels, you should likely be able to see some water pooled on the edge of the lake, surrounding the tree. It looks eery yet captivating, how this crack willow sits alone in the water, perfectly calm and reflected. It wasn’t a surprise to know that it’s the most photographed tree in all of New Zealand!

While the morning is still young, it’s time to leave Wanaka and make your way towards Queenstown, for a day of light walks and relaxation, especially after a strenuous Day 6.
After leaving Wanaka, you’ll make your way towards Queenstown via the scenic Crown Range Road. As New Zealand’s highest main road, this drive winds through rolling alpine landscapes with sweeping views over the surrounding mountains and valleys. There are plenty of lookout points along the way, so don’t be afraid to pull over whenever something catches your eye.
Lake Hayes & Amisfield Winery
Before reaching Queenstown, make a stop at Lake Hayes. After several busy sightseeing days, this peaceful lake was a refreshing change of pace. We took a leisurely stroll along part of the shoreline while the morning was still calm enough to create beautiful reflections across the water. Aside from a lone fisherman quietly casting into the lake, we practically had the place to ourselves, making it one of the most tranquil stops of the trip.

Just a few minutes away, treat yourself to a wine tasting at Amisfield Winery. Surrounded by vineyards with the Remarkables rising in the distance, it’s one of the most scenic cellar doors near Queenstown. Central Otago is world-famous for its Pinot Noir, but you’ll also have the chance to sample excellent Riesling, Sauvignon Blanc, and Rosé while soaking in the views. If you have a little extra time, the restaurant is also considered one of the region’s finest.

Hot Pools or Floating Saunas
After your tasting, continue into Queenstown for one of the area’s most relaxing experiences at Onsen Hot Pools & Spa. Perched above the Shotover River, the private cedar hot pools overlook a spectacular canyon and mountain backdrop, making it an unforgettable place to unwind. Reservations are absolutely essential, especially during sunset, as sessions often book out weeks or even months in advance. A private one-hour soak starts from around NZ$118 for one person or NZ$175 per pool for two people, with towels included.
If the Onsen Hot Pools & Spa is a little outside of your budget, or it’s all booked up for the day, check out the floating sauna of Watershed Saunas. It’s a revitalizing experience, jumping between heating up your body the Finnish way and taking a cold plunge into Lake Wakatipu, all while admiring the incredible alpine views outside the full height windows.
Arrival in Glenorchy
Once you’ve finished relaxing, it’s time for one last scenic drive of the day. Follow the shores of Lake Wakatipu to the charming town of Glenorchy, where you’ll spend the night at one of the area’s more basic paid campgrounds, Mrs Woolly’s Campground. The facilities are simple, but the setting more than makes up for it.
Before calling it a day, head over to the Glenorchy Wharf & Viewpoint for golden hour. As the sun dips behind the mountains, the calm water, historic red wharf, and dramatic peaks create one of the most beautiful sunset spots on the South Island.
It’s a small and quiet town, but if you’re looking to take a break from the cooking and dine out for dinner, there are a few restaurants in Glenorchy, like the Base Camp Kitchen, worthy of trying.
Day 8 – Queenstown to Fiordland
- Driving Distance: 300 km (190 miles)
- Campsite: Cascade Creek Campgroung (DOC)
- Highlights: Skyline Queenstown, Drive along Lake Wakatipu, Eglinton Valley
After spending the night in Glenorchy, enjoy a slower start to the morning before the long drive ahead. You can make breakfast at a comfortably pace overlooking the water at Glenorchy Wharf one last time, where the still lake and surrounding mountains create one of the most peaceful settings on the South Island. If you’re lucky, the water may be calm enough to reflect the dramatic peaks across the township.
Skyline Queenstown
Once you’re ready, make the drive back to Queenstown and head up to the iconic Skyline Queenstown Gondola. Although the gondola doesn’t begin operating until 9:30am, it’s well worth the wait. As you climb above town, Lake Wakatipu stretches out below while the Remarkables and surrounding mountain ranges dominate the horizon.
At the summit, you’ll be treated to panoramic views over Queenstown, Lake Wakatipu, Cecil Peak, Walter Peak, and the rugged mountains beyond. During spring, summer, and autumn, visitors can enjoy scenic walking trails, mountain biking, dining with a view, and the famous Skyline Luge, which remains one of Queenstown’s most popular attractions. In winter, the gondola becomes a gateway for skiing and snowboarding at the summit, while still offering some of the best viewpoints in the region.
Drive Along Lake Wakatipu and Lake Te Anau
After soaking in the views, it’s time to begin the journey toward Fiordland National Park. Leaving Queenstown, you’ll follow the southern shoreline of Lake Wakatipu, which quickly became one of our favourite drives in all of New Zealand. The road hugs the mountainside as it winds along the lake, creating spectacular views around nearly every bend. While there are several roadside pullouts worth stopping at, some of the best scenery is actually enjoyed from behind the wheel, watching the winding road snake along the cliffside with the deep blue waters of Lake Wakatipu stretching out to your right.
Today’s drive is one of the longer ones on this itinerary. Continue south along State Highway 6 before turning onto State Highway 97, which then merges onto State Highway 94 toward Te Anau. Many travellers choose to spend the following night(s) in Te Anau when exploring Fiordland, since it’s the last major town before Milford Sound and offers supermarkets, fuel stations, restaurants and accommodation options.
However, if you’re travelling in a self-contained campervan, there’s no reason to lose valuable time doubling back tomorrow. Instead, continue directly into Fiordland National Park and spend the next two nights surrounded by nature. Before you do, make sure to empty out and refill on what you need for your camper! There are limited facilities and zero gas stations past this point, so Te Anau will be your last chance to do so.
Beyond this point, the landscape begins to feel noticeably wilder. The drive along Lake Te Anau may not be quite as dramatic as Lake Wakatipu, but it’s far quieter, especially when travelling northbound in the afternoon, when the morning rush of people getting to Milford Sound have gone.
Entering Fiordland National Park
Before reaching your campground for the night, make a stop at Eglinton Valley. Surrounded by towering mountains, this vast glacial valley is one of the most beautiful open landscapes in Fiordland. The enormous grassy meadows framed by rugged peaks create a scene that feels almost untouched by time. I definitely had my “The Hills Are Alive” moment, though I was indeed not on a hill but in a valley.

A little farther along the road, stop at Mirror Lakes, one of Fiordland’s most photographed viewpoints. On calm days, the small lakes perfectly reflect the Earl Mountains, creating a postcard-worthy scene that’s especially beautiful in the late afternoon light. Unfortunately, when we arrived, it was pretty windy so we couldn’t see a reflection. Once again, mornings are the best opportunity for that, but maybe you’ll be luckier!


For the next two nights, settle into Cascade Creek DOC Campground. This DOC campground requires an additional fee on top of the DOC pass (if you purchase one), and offers only basic facilities, with no showers or flush toilets available. Despite its simplicity, it ended up being one of our favourite campgrounds in New Zealand.
The grounds are incredibly spacious and well maintained, with cooking shelters, picnic areas, and plenty of space to make your site with a little bit of privacy. Tucked away among native forest beside a peaceful creek, it feels wonderfully secluded and provides the perfect base for exploring Fiordland National Park. Which we’ll be doing starting tomorrow.

Day 9 – Milford Sound
- Driving Distance: 85 km (53 miles)
- Campsite: Cascade Creek Campground (DOC)
- Highlights: Milford Road, Milford Sound Cruise
This was one of our most memorable days in New Zealand and a lot of it had to do with the conditions we got, which you’ll see from the photos. Even though the drive from Cascade Creek Campground to the Milford Sound area is not even 1 hour long, you can expect to take 3-4 hours (or longer in our case) to make your way along Milford Road.
The Best Viewpoints Along Milford Road
If the weather is great for you too, you might stop more often than at the viewpoints you expected to visit. For this reason, we gave ourselves plenty of time, even though our morning started off pretty moody and foggy.
As we made our way along the road, we ended up taking a quick peek at Lake Fergus which was so gorgeous with the low fog and calm waters. Next up was Pop’s View Lookout which was a quite cul-de-sac parking area overlooking the valley, but the view was much better and less obstructed at Hollyford Valley Lookout. Here we could see Mount Christina towering above and the valley leading to Lake Marian stretching below. It was at this point that we could also start to hear the Hollyford River streaming underneath us.
We made one more short detour at Falls Creek Falls, where the small cascades poured into an ethereal pool of vibrant blue, before we hit the first spot that we actually planned to visit: Monkey Creek. As the clouds finally started to lift, we realized how staggering the peaks of Fiordland actually were. The clouds were just brushing the tops of Mount Christina and Mount Talbot, framing them beautifully as we snapped some shots amidst the shrubbery by the creek.
The road views were getting even better, and after we made a quick stop at Gertrude Valley Lookout—a starting point for one of the most insane hikes in Fiordland, Gertrude Saddle—, we reached the entrance for the long stretch of straight and narrow road that is Homer Tunnel.
We were sitting at the traffic light, waiting for the green to let us through, and could’ve waited for as long as we needed. Because the view to our right of the Darran Mountains Waterfall Vistas was as dramatic as they come. If we weren’t already in a line of cars awaiting our turn through the tunnel, we would’ve definitely pulled over to venture the area.
But the next spot was by far our favourite and most picturesque of the road scenes so far. Again, this was not a planned stop, but as we were approaching it, we knew we had to pull into the parking lot. The Milford Valley Lookout is so postcard worthy and is truly a testament to why Fiordland and Milford Sound are such an iconic destination in South Island New Zealand. The continuation of Milford Road paving in an ‘S’ shape down into the valley made for the perfect photo subject.
After days of rain, you’ll be able to see the Hundred Falls rolling down the soaring rocky mountains when you make your way down the mountain road. And before you know it, you’ll have reached The Chasm Walk, which is light a stroll on metal boardwalks through the dense and lush rainforest. After everything we saw, this one was more underwhelming even though it gave us an entirely different scenery.
The thing about the Fiordland region and the West Coast of South Island is that they boast a unique landscape of alpine rainforest. It’s the best of both worlds, where high alpine snowfields meet temperate rainforests near the Tasman Sea. Which brings us to the depths of the wide and vast Milford Sound.
Cruise Through Milford Sound
Parking at the visitor terminal is paid by the hour and it isn’t cheap. There’s a free gravel parking area located near the Milford Sound airstrip that is large enough to have spots available by the time you come. From there, it’s about a 15 to 20-minute walk to the famous Milford Sound Lookout. After soaking in the view, simply continue along the scenic boardwalk and you’ll arrive at the cruise terminal with plenty of time before departure.
We deliberately chose one of the later cruise departures at 3:30pm, which gave us the entire morning to enjoy Milford Road without feeling rushed. It also gave us enough time to have lunch at our campervan and relaxing for a while before we walked over to the pier to set sail.
There are cruises departing throughout the day with several different operators to choose from, but we opted for Mitre Peak Cruises after hearing that their smaller vessels can get much closer to the waterfalls than many of the larger boats. They also only carry 75 passengers as opposed to the 200-400 person capacity of other carriers, so it made for a quieter experience.
Our cruise lasted around two hours, taking us the full length of Milford Sound before reaching the mouth of the Tasman Sea and returning to the terminal. From the moment we left the wharf, towering granite cliffs rose almost vertically from the water, with waterfalls cascading down both sides of the fiord. Along the way, we passed the impressive Bowen Falls, the tallest permanent waterfall in Milford Sound, before cruising past Fairy Falls, Bridal Veil Falls, and a few of the seasonal cascades that trickled down the mountainsides.
One of the biggest highlights came when the captain steered the boat right alongside Stirling Falls. Being on a smaller vessel really paid off here, as we were able to get incredibly close to the roaring waterfall. Standing on the open top deck, we were blasted by cool mist and spray while strong winds whipped across the fiord. It was easily one of the most memorable moments of the cruise.
We also spotted several New Zealand fur seals lazily lounging on the rocky shoreline, seemingly unbothered by the passing boats. As we approached the entrance to the Tasman Sea, the towering cliffs gradually gave way to the open ocean before the boat turned around for the journey back into the heart of the fiord.
You’ll often hear people say that Milford Sound is best experienced in the rain, and while it’s true that heavy rainfall creates thousands of temporary waterfalls and a mystical scene with the mist and fog, we didn’t regret having a sunny afternoon one bit. Sure, the waterfalls weren’t quite as thunderous, but the sunshine brought the landscape to life in a completely different way.
Every mountain ridge, sheer cliff face, and hanging valley stood out in remarkable detail, with vibrant greens contrasting against the dark granite walls. We could clearly see mountain bowls, jagged ridgelines, and countless textures that may have otherwise been hidden beneath cloud and mist.
The return journey ended up being just as magical as the trip out. As the afternoon sun dipped lower, soft golden light streamed through the fiord, casting dramatic shadows across the mountainsides and adding even more depth to the landscape. As we neared the terminal once again, a beautiful rainbow appeared across Bowen Falls, creating one final unforgettable view before stepping back onto land.
Sunset View of Mitre Peak
After the cruise, head back to your campervan for dinner before returning to the waterfront one last time. You can drive over this time and park in the paid lot, as you’ll only need an hour, and follow the short Milford Sound Foreshore Walk out to the beach. Facing directly toward the iconic Mitre Peak, it’s one of the best places to slow down and appreciate just how special this place is.
While our sunset wasn’t particularly colourful, we had the shoreline entirely to ourselves. After the crowds of the day had disappeared, the stillness of the fiord made for a peaceful end to one of the most memorable days of the entire trip. If you enjoy photography, this is also a fantastic time to set up your tripod and capture a few long-exposure shots of Mitre Peak reflected in the calm waters.
Day 10 – Fiordland Hikes
- Driving Distance: 160 km (100 miles)
- Campsite: Mossburn Country Park
- Highlights: Lake Marian Track, Key Summit Trail
Today is all about hiking, much like our Day 3 in Aoraki / Mount Cook. After yesterday’s scenic drive and unforgettable Milford Sound cruise, you’ll be spending the day exploring two of Fiordland National Park’s best half-day hikes. Both trailheads are only about a five-minute drive apart, making it easy to complete them in a single day without feeling rushed.
Lake Marian Track
Start the morning with the Lake Marian Track, a beautiful rainforest hike leading to one of Fiordland’s most stunning alpine lakes. At 6.3 km (3.9 miles) round trip with around 410 metres (1,345 feet) of elevation gain, this is the slightly shorter but more challenging of today’s two hikes.
The trail begins with a suspension bridge over a rushing river before climbing steadily through dense native rainforest. Compared to many of the other hikes on this itinerary, this one felt a little more rugged. Sections of the path become narrow as they weave between moss-covered trees, while exposed roots, rocks, and boulders require a bit more attention underfoot. Since Fiordland receives so much rainfall, expect muddy patches throughout the hike, even after several dry days. We were very glad to have waterproof hiking shoes on our feet as we traipsed through mud and on top of some wet, smooth boulders.
There is also one short section that required a small vertical scramble, but it wasn’t particularly difficult and never felt exposed, as the trail doesn’t follow any steep cliff edges. But after 1.5 hours of trekking, the reward at the end of the trail was absolutely worth the effort!
As the forest suddenly opens up, you’ll be greeted by the brilliant emerald waters of Lake Marian, surrounded by towering mountains rising almost straight from the shoreline, creating the most gorgeous hidden valley. During our visit, low clouds drifted between the peaks while the calm lake created near-perfect reflections of the surrounding cliffs.
Even more surprising was how quiet it was. We spent around 45 minutes relaxing by the lakeshore and had the entire place completely to ourselves. If you pack a swimsuit, this is also a fantastic place to cool off with a refreshing (and chilly) alpine swim after the climb through the forest.
Key Summit Trail
After hiking back down, make the short drive to the Routeburn Shelter car park, where the Key Summit Track begins. We took the opportunity to make a quick lunch in our campervan while waiting for a passing rain shower to move through. Fiordland’s weather changes quickly, so sometimes a little patience pays off.
Once the skies began to clear enough, we set off on our second hike of the day. The Key Summit Alpine Walk is 8.2 km (5.1 miles) round trip with approximately 420 metres (1,378 feet) of elevation gain. Although slightly longer than Lake Marian, we found the trail itself a little easier thanks to its well-maintained gravel switchbacks.
You’ll quickly notice this is a much busier hike than Lake Marian, which isn’t surprising considering it shares the famous Routeburn Track with one of New Zealand’s Great Walks. While many hikers continue much farther into the Routeburn, we’re only heading to Key Summit, which makes for an excellent half-day adventure.
The trail climbs steadily through lush beech forest before emerging above the treeline. Although the uphill switchbacks can feel tiring—especially after already completing one hike earlier in the day—the scenery becomes more and more impressive as you gain elevation.
Once you reach the summit plateau, the landscape changes completely. Well-maintained boardwalks wind through alpine wetlands dotted with small tarns, hardy mountain vegetation, and panoramic viewpoints in nearly every direction. Rather than a single dramatic viewpoint, Key Summit is all about exploring this beautiful alpine plateau at a relaxed pace.
One of our favourite moments was reaching the “true” Key Summit, featuring a viewpoint overlooking the valley containing Lake Marian. It was incredible to look across the mountains and spot where we had spent our morning just a few hours earlier. While the summit itself isn’t necessarily the main attraction, the peaceful alpine scenery, crystal-clear ponds, and sweeping mountain vistas throughout the nature walk make Key Summit one of Fiordland’s most rewarding short hikes.
Leaving Fiordland National Park
After completing both hikes, you can either return to Cascade Creek Campground for one final evening surrounded by Fiordland’s incredible wilderness, or make the two-hour drive to Mossburn.
Wrapping up the day with not one, but two, day hikes, we were pretty pooped and honestly very much looking forward to a shower. So instead of spending a third night in the remote Fiordland, we opted to make the drive to Mossburn Country Park where they had powered sites, hot showers, a kitchen and indoor eating area. It also helped cut down the drive time heading back up north over the next two days.
Day 11 – Mossburn to Tekapo
- Driving Distance: 120 km (75 miles)
- Campsite: Mackenzie Waitaki RV Camping
- Highlights: Kawarau Bridge Bungee Jump
It’s at least a 10-hour drive from Mossburn to our next South Island destination, Kaikoura. You could do it all in one day, but taking another day’s opportunity to make other stops along the way, whether to do undertake new experiences or just soak in the nature sights as you go, might just be the better way to do it.
It’s up to you how you want to prioritize your time, but we ended up splitting the drive across two days. We drove along Lake Wakatipu again and made several stops along the lake when passing through Kingston. It honestly looked different driving back in the opposite direction than what we did on Day 8, especially now that our welcome back to Wakatipu was at its southern tip.
If you’re looking to chase an adrenaline high, you’ll be passing by the Kawarau Gorge Suspensions Bridge just 25 minutes east of Queenstown. This is where the world’s first ever commercial bungee jump operation is located and it is all the more popular today than it was back when it started in 1988. It won’t be me hanging on that bungee cord, but if this is right up your alley, you don’t want to miss your chance at having an iconic (and secured) plummet straight into the turquoise Kawarau River!
Take the rest of the drive at your own pace, making stops at Lake Pukaki and Tekapo once again before finally settling into the Mackenzie Waitaki RV Freedom Camp for the second time this trip.
Day 12 – Drive North to Kaikoura
- Driving Distance: 640 km (400 miles)
- Campsite: Kaikoura Freedom Camping Car Park
- Highlights: Kaikoura Beach
Another day of driving, and it’s only two more days until you’ll likely fly out of New Zealand—or perhaps to North Island which was also an epic time for us! Your opportunities to get another hearty New Zealand pie are numbered at this point, and there are few better places than Fairlie Bakehouse to get one. Our pies and flat whites really hit the spot for our Day 12 breakfast before we hit the road for another five hours.
The rest of the road was not as eventful, but we managed to lock in a spot at Kaikoura’s Freedom Camping Car Park, located steps from Kaikoura Beach. There are only 10 parking spots dedicated to overnight campers so it’s recommended to arrive in the afternoon to secure one. 5:30pm to 8:30am is the “free parking” time range, and anything outside that window requires payment. We paid two hour’s worth of parking after arriving at 3:30pm and took our early arrival to go walk along the beach and rest up.
Day 13 – Kaikoura
- Driving Distance: 25 km (16 miles)
- Campsite: Alpine-Pacific Holiday Park
- Highlights: Scenic Whale Watching Flight, Kaikoura Peninsula Fur Seals
Today is your final full day on New Zealand’s South Island, and it’s one you’ll remember for a long time. Kaikoura is one of the best places in the world to see marine wildlife, so this morning is dedicated to an unforgettable scenic flight over the coastline.
Whale Watching Scenic Flight
We booked the 9:00am departure with Air Kaikoura Aero Club, giving us plenty of time to enjoy the rest of the day afterwards. While we’d later experience the famous Blue Hole scenic flight in Belize, this one offered something completely different. Rather than following a fixed sightseeing route, our 40-minute flight became an exciting search mission as the pilots scanned the waters below for whales surfacing off the Kaikoura coastline.
We couldn’t have asked for better conditions. The weather was beautifully clear, allowing us to fully appreciate the dramatic contrast between the turquoise ocean, rugged coastline, rolling farmland, and the snow-capped Seaward Kaikoura Range rising almost directly behind the shore.
Then came the wildlife.
Not only were we lucky enough to spot two sperm whales, but we also found a fin whale—an incredibly rare sighting on these flights. As the world’s second-largest animal, fin whales spend very little time at the surface before diving again, making them much harder to find than sperm whales. Watching all three giants from above was one of the most surreal wildlife experiences we’ve ever had and easily ranks among our favourite moments from the entire trip.
The seven-passenger aircraft is fairly small, so don’t be surprised if the constant circling while searching for whales leaves you feeling a little dizzy. For us, though, it was a small price to pay for such an incredible experience. Take some motion sickness remedies before going on the flight as a precaution!
Kaikoura Peninsula Walkway Fur Seals
Back on solid ground, continue just a few minutes south to the Kaikoura Peninsula Walkway. This easy coastal walk offers yet another opportunity to experience the area’s abundant wildlife.
Almost immediately after arriving, we were greeted by a huge colony of New Zealand fur seals sprawled across the rocks and beaches below. Some slept peacefully in the sun while others played together in the shallows, and although you must always keep the required distance from the seals, it was still amazing to watch them in their natural habitat. The playful young pups were most curious about nearby humans!
The walkway gradually climbs onto the clifftops, rewarding you with constantly changing views over the peninsula, the Pacific Ocean, and the surrounding mountains. Looking down from above, the seal colony almost resembled tiny moving dots scattered across the shoreline. We spent around two hours exploring before turning around, but if you have the time and energy, you can continue on to complete the full loop.
Kaikoura Lookout
After your walk, head up to the nearby Kaikoura Lookout, where you’ll be treated to one final panoramic view over the coastline. It makes a wonderful place to stop for lunch, especially if you’re travelling by campervan and can enjoy a relaxed meal with the rear doors open toward the scenery.
Since this is your final evening on the South Island, consider checking into your accommodation a little earlier than usual. We stayed at Alpine-Pacific Holiday Park, which gave us the perfect opportunity to catch up on laundry, clean our muddy hiking shoes after several days in Fiordland, and relax with a refreshing swim followed by a soak in the hot tub.
To finish your South Island adventure, find a quiet spot to watch the sunset. We were treated to the most beautiful sunset of the entire trip, as the sky lit up in oranges and pinks above the green plains with the mountains silhouetted not too far in the distance. It was the perfect farewell to two unforgettable weeks of exploring one of the most spectacular islands we’ve ever visited.
Day 14 – Kaikoura to Christchurch
- Driving Distance: 180 km (110 miles)
Your South Island New Zealand trip is a wrap! If you’re flying out today or still have another night to go, you’ll likely want to may your way to Christchurch. If you’re returning your campervan today, don’t forget to check off all the must-do items in your guest handbook! One of the main ones for us was to refill our LPG cylinder, which was really easy to do at the recommended shop given by Euro Campers.
We flew out that very afternoon, but if you’re sticking around, I hope you get to check out the Christchurch Gondola for the screensaver view of the Port Hills! Or maybe stop by the Riverside Market followed by a peaceful punt along the Avon River.
Thanks for Reading!
I know this was a long one, so thanks so much for sticking with me through it all, or at least reading some of the highlights and glancing at our photos for inspiration for your New Zealand road trip! New Zealand offers so much that doing a road trip in both North Island and South Island was a must for us.
From the bright blue lakes of Tekapo and Pukaki to the staggering mountains of Mount Cook, Wanaka and Fiordland, from the unique topography of Milford Sound to the ever present wildlife and thriving ecosystem of Kaikoura, two weeks might not even seem like enough and you’ll be itching to book a flight back in no time.
If you liked this blog, I bet you’ll most certainly enjoy our Iceland 10-day road trip guide, our Madeira 7-day road trip itinerary, or our Italian Dolomites travel guide.
